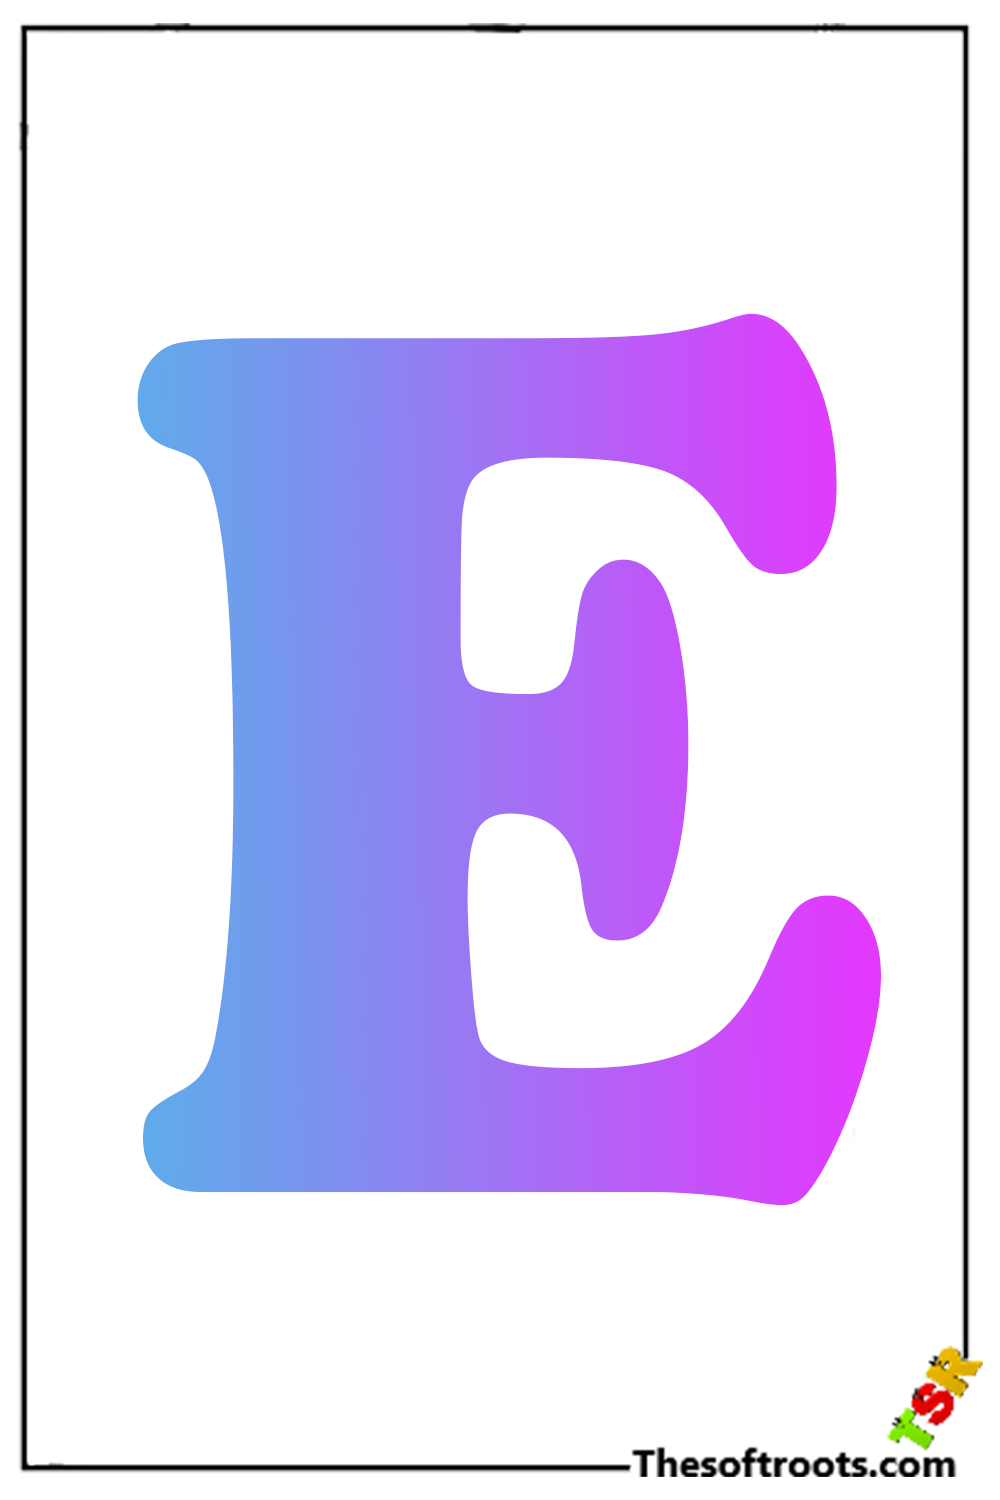
Pocket E
Is the letter E the most usually involved in the letter set? This vowel shows up in many words, so it is possible one of the principal letters we will figure out how to compose. While you can compose this letter in both upper and lowercase, now is the ideal time to take this further by figuring out how to draw an air pocket letter E. In this aide, we will make you through 6 strides on the most proficient method to attract this letter in a truly fun way. Then, at that point, we will show you how you can vary it and add some additional tomfoolery contacts.
Visit the Lion Coloring pages.
As you make and add to this drawing, there is a lot of space for innovativeness, so feel free to explore and have a good time! With all that far removed, let’s leave on the initial step to get you rolling with making this air pocket letter.
Instructions to Draw Your Own Air pocket E stage 1
For this aid, we will draw the capitalized rendition of this letter as we make your air pocket letter E. In the initial step, we will begin by drawing the spine of the letter. To do this, we will define a genuinely lengthy vertical boundary. As you can find in the reference picture, this line will have a slight bend to it. The explanation for it being bent rather than straight is that the letter should seem as though it is made of an air pocket.
This line will bend inwards at each end, as this is where it will interface with the parts of the letter E that we will attract later advances. Whenever you have defined this boundary as it shows up in our reference picture, you will be prepared to move to stage 2, where we will add more precisely.
Instructions to Draw Your Own Air pocket E Drawing stage 2
Then, we will draw the top ‘part’ of the letter E. This will append to the best in class you attracted stage 1. In our reference picture, you will see that the state of this first branch has formed a piece like a thumb. It’s drawn with another somewhat bent line that then bends internally strongly. Whenever you have drawn this branch, we will then, at that point, add another bent line underneath it. This will be the space between this branch and the center we will draw later. If you run into any inconvenient pieces of this plan, you can draw a pencil and afterward go over them with your pen when you’re content with it.
When you have drawn this branch, we can continue to stage 3.
Instructions to Draw Your Own Air pocket E Drawing stage 3
In sync 3 of this aide, we will make an identical representation of the lines we attracted in the past step. This time, the branch we are drawing will be at the base, so we will attract it comparably to how you drew the top part of your air pocket letter E. It will stretch out from the finish of where the absolute first line finished at the base, and afterward, it will bend internally. While it’s attracted much the same way as the one in the past step, it needn’t bother to be indistinguishable.
You’ll see that in our model, the branch on the base is undeniably thicker than the top. Similarly, as with the main branch, this one will likewise have a short, vertical bent line joined to it. This will leave a hole in the middle. In the subsequent stage of the aide, we will fill that hole with the last branch, so how about we do that at this point?
Instructions to Draw Your Air pocket E Drawing stage 4
In this fourth step of the aide, we will draw the third and last arm of your letter E. Not exclusively will this be the last arm, but it will likewise polish off the diagram before we start on a few inside subtleties. To draw this last branch, add one more bent line starting and finishing inside the hole between the other two branches. As you can find in the reference picture, this third focus branch will be undeniably more limited than the past ones. You’re prepared to continue toward the following stage for some last contacts when it’s there!
Before that, ensure that the blueprint looks precisely as you need it. If you utilized a pencil to do any preparation, this moment would be the best opportunity to eradicate them before continuing.
Instructions to Draw Your Air pocket E Drawing stage 5
The blueprint is done now, so next, we will zero in on adding a few inside subtleties and contacts. These will make the letter look less level and seem like an air pocket. The most vital step towards doing this is drawing a little oval shape. This oval will go close to the highest point of the letter, as displayed in the reference picture. We are attracting this oval to make the letter appear as though it is mirroring light, which assists with rejuvenating it.
To reflect the deception of additional light sources, you could add a couple of additional ovals to various letter segments. When you’re content with the reflections on your air pocket letter, we can add a few bent lines inside the framework. These will go close to the internal segments of the layout to make it appear as though the latter has more profundity. Once more, you could add a couple more if you want to make your letter look significantly more full.
Before we continue toward the last step, you can add a few tomfoolery additional subtleties. This is where you can truly set free and be innovative! One thought is to pick a topic, beginning with E. Then, at that point, you can add little subtleties or little pictures around the letter to fit the subject. You can consider it for the present. However, we will discuss a few additional thoughts after adding variety in the following stage.
Instructions to Draw Your Own Air pocket E Drawing stage 6
We have the aide’s last step, which may be the most awesome aspect! This is where we will add a variety to your air pocket letter E to rejuvenate it. There are boundless conceivable outcomes here, and you can be innovative. Our reference picture showed you the varieties we would decide on for this drawing. Assuming you like what it looks like, you can attempt to coordinate how we managed your number one shading instruments! As may be obvious, we went for a muffled turquoise variety plot.
We didn’t adhere to strong varieties and, on second thought, utilized a slope of light varieties blurring into more obscure ones. Doing this assists with giving the air pocket significantly more profundity. You should utilize some other varieties you love! You don’t need to adhere to only one bunch of varieties for a moment. It may be amusing to draw a few examples and shapes while integrating different artistry mediums. Why not challenge yourself to utilize some specialty supplies you’ve not utilized previously?
Also Read Maquis music